
Ok, so I've been trying to cook pretty healthy these past few weeks but somehow my cravings for preservatives and cheese always get in the way--not tonight, this dinner was a win!
Unfortunately, I don't have a final outcome picture for you because my camera died in the middle of cooking (unbelievable I tell you--doesn't it know I am BUSY!?) So, let's start at the beginning--skinning the salmon--yuck.

It's not pretty, but it must be done (unless you want to eat the skin, which is of course a possibility, I chose not to for this recipe). First things first, sharpen your knife. You should use a filet knife which is sort of curved (or so I've read) but I do not have such and as I don't skin fish on an everyday basis, I get by with what I've got.

I prefer to have the fish sort of frozen (as in alllllmost defrosted) but I've read many websites indicating that its best done at room temperature, so this is up to you. Keep in mind, if you go with sort of frozen, your hand will be cold. Yowza I had to take a few quick breaks! Start on the tail end of your fish and make a small incision between skin and fish, as close to the fish as you can, and at an upward angle. Once you get your first separation, hang on to the little skin you have and pull back, as you cut in. Be mindful that you aren't digging into the fish, sometimes you'll have to readjust your knife angle, but keep cutting and pulling until you get to the end.
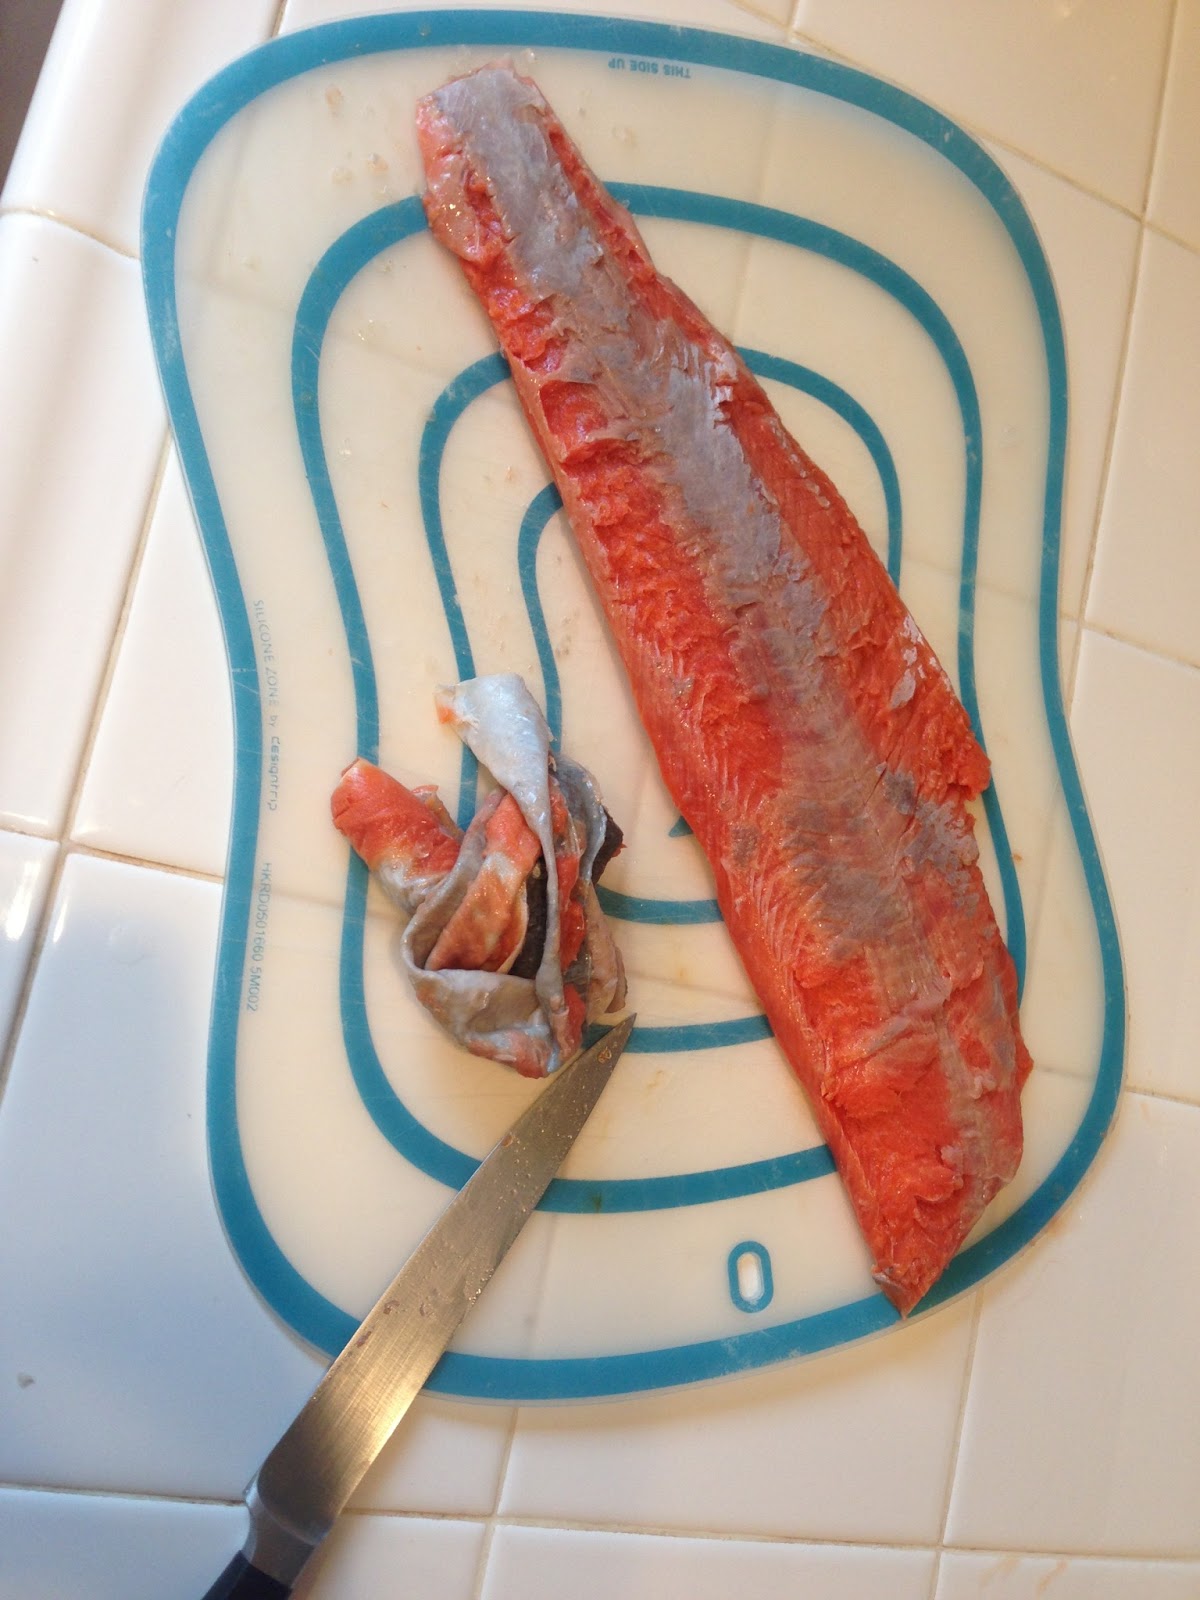
Wallah! The more skin you have off, the easier it gets, because you have more skin to "hold" (ugh so gross) so if its rough at the beginning keep pressing through. Mine is never perfect, but it gets easier every time, just like anything :)

After your salmon is skin free, you're going to want to cut it into kebab like chunks, about an inch thick. I sliced mine width wise and then cut the chunks.

Looks like someone can smell the fish! This is my darling cat Six, always looking for trouble. But oh so adorable, so who could be mad? (I gave her a small piece, I had to--look at that face!!)

I should tell you, I made a boo boo and I didnt put my skewers in water until after I had already skinned and cut the salmon. These should be soaking for about an hour (this is serious, if you do not soak your skewers, they will burn, and if they burn, well, that takes the kebab right out of kebab doesn't it?). I put them in as soon as I remembered and I ended up being okay. The ends charred, but the total stick stayed intact. Anyway, if you put yours in at the beginning it will be better.
After the stick fiasco, time to slice the lemons. I used two whole lemons, (remember to wash these since you will be keeping the rind on) sliced very thinly (as thinly as you can).

Once the big things were under control, next step is to tackle the spices. Here you can see Red Pepper Flakes, Cumin, Sesame Seeds and Salt. There is also supposed to be fresh Oregano--more on that in a moment... I used 1/4 tsp Red Pepper Flakes, but you can use more if you like it spicy--I didn't find that 1/4 tsp was very spicy at all. For Cumin I used 1 tsp and I just poured in Sesame Seeds and Salt til it seemed like enough. I always like to measure out my spices into one small bowl and then put the spices away, it makes it easy to just throw it on/in or wherever its going.

Next comes the fun part--skewering! Begin with salmon at the end (to hold on the lemon) and alternate with a lemon folded in half and a piece of salmon until you get to the end. I chose to do 5 pieces of salmon but it's up to you and how many kebabs you want to make.

Once you're all skewered, drizzle or brush EVOO all over your kebabs (make sure to turn them and get all sides) and then sprinkle your spice mixture on (again make sure to turn them).

An important part of this recipe is fresh oregano and I almost had a total fail here! We grow the oregano in our garden, and so even though I knew I needed to go cut some, because it wasn't in the kitchen, I almost forgot! But looking at the salmon kebabs all spiced up, well, something just seemed to be missing! In any event, make sure that you grab some fresh oregano, strip the leaves off the stems and finely chop. You can either add it to your spice mixture from the get go, or add it on at the end like I did. Personally, I would add it on at the end again because I feel like I got a better handle on spreading it out by doing it by itself. You can also use ground oregano if you don't have access to fresh, although it will slightly change the taste.

Last but not least, get to grillin'! Medium is best for the fish since its pretty delicate, you don't want it to burn on the outside, before the inside is done. I like to use all the burners at once because I feel like it heats the BBQ more evenly but that's just my personal opinion (actually it's my husband's opinion and he is King of the BBQ at our house). You can also do these on a grill pan inside, but again, as with the oregano, you'll have a slight flavor change.

This is completely unrelated to the kebabs, but while I was waiting for them to finish, I noticed that our blackberries are turning!!! I am SO excited! We picked this plant up on a whim at Lowes, just for fun, and when I got home I read up on it and some sites said that blackberries might take up to 2 years to produce fruit and that without another fruit plant nearby it might not produce fruit at all because there would be no pollination. Well lookee here!
Anyway, back to the meal at hand! These guys should take about 10 minutes on the grill, make sure you keep turning them so they cook evenly. They are done when they easily flake off. (Best part about cooking, sampling during the process!).
Like I said before, I don't have a final picture because of the lame camera, but honestly these are prettier before they are cooked because of the bright pink salmon color. I served them with rice and it was all done.
This is my favorite rice by the way--we have a rice cooker, but seriously, this cooks in the microwave in 90 seconds, why go through all the trouble to get out the rice cooker etc? Too much!

Oh, by the way, you are meant to tear the edge of this rice when you put it in the microwave to allow venting. This is serious stuff, make sure you do it. If you don't, well your rice might explode in your microwave and it might stay there for awhile until you clean it. (Don't ask how I know this. I just do.).
Until next adventure,
M
Recipe adapted from Bon Appetit's Spiced Salmon Kebabs: http://www.bonappetit.com/recipes/quick-recipes/2013/06/spiced-salmon-kebabs
No comments:
Post a Comment